Creating Your Cards
You’ve been making cards, just for fun, for a little while now, and people seem to like them. You think you might like to take the plunge and have a go at selling your creations. Well, with a little bit of research, you can be one of the growing numbers of crafters doing just that. Read our step-by-step guide to find out how.
Inspiration
The first and most important step of your card making enterprise is, of course, to come up with some great designs! Time spent to get these right will really pay off later, so take as long as you need.
You can find lots of sources of inspiration if you look in the right places:
- Card project ideas on websites and in magazines.
- Cards for sale in shops.
- Front covers of books.
- Posters, paintings and photographs.
- While you won’t be able to copy these outright, you can take elements you like and adapt them.
Think about seasonality, and try to come up with designs to cover all the important occasions in the calendar. That way you’ve a better chance of attracting business all year round.
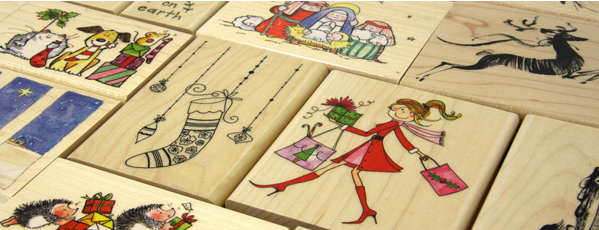
If you plan on using rubber stamps in your designs, you’ll need to check if the stamp designer has an “angel” policy, allowing people to sell cards bearing their designs.
Find out if they do, and whether there are any limitations, before designing any cards using their stamps. You should be able to find out from their website, but if not, drop them a quick email.
If you are using any pre-made items like backing papers and embellishments, you’ll also need to find out whether any of these designs are copyrighted, and if so, whether there are any conditions of use. Some designers require attribution on the card, some specify maximum numbers of cards you can sell per year, etc. Again, you should be able to find out on their website or by emailing them.
When you’ve arrived at a few designs, look at them with a critical eye and ask honest friends for their feedback. It’s really important to get your designs right, since all the other parts of the process can be refined along the way – but ultimately your success (or otherwise) will depend on whether or not people like your cards!
Remember, once you’ve built up your bank of designs, you have them forever – all you need to do is reproduce them. So take your time and create designs you’re really proud of.
Unique Selling Point
If you can, it’s definitely worth trying to find a unique angle that sets you apart from other card makers. There are lots of people making handmade cards out there, so it’s a good idea to have something that makes you memorable.
- Could you use 100% recycled materials?
- Write your own verses to go inside?
- Specialise in making cards for a particular occasion, or in a certain colour scheme?
- Create a set of characters that feature on all your cards?
- Or even offer a bespoke service where you create cards to order?
Come up with something that will give people an extra reason to buy from you, besides your beautiful cards.
Materials
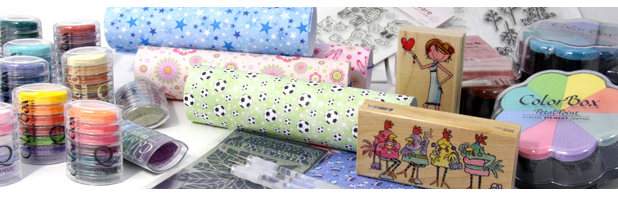
Once you’ve finalised your designs, draw up a list of what you’ll need to make a batch of each. The price of materials can vary quite dramatically, so do your homework to make sure you get the most for your money. If it’s practical for you in terms of money and storage, it can work out a lot cheaper to buy your materials in bulk.
Packaging
Always put your finished cards in cello bags to keep them pristine and make them look professional, and though it might sound obvious, include envelopes! It’s also a nice touch to put a sticker on the cello bag with your business name and contact details on.
Remember, unlike lots of other purchases, cards are sold on appearance alone, so try and make the whole package as appealing as possible. Keep in mind the importance of repeat business. It costs a lot more money to attract new customers than to hold on to existing ones. So keep them coming back for more!
If you plan on sending orders via post, a little touch like including a handwritten thank you note with their order goes a long way – and only costs you pennies.
Pricing
Pricing is a delicate balancing act. Start by working out your rough cost price per card, to give you an idea of the minimum you need to charge to make a profit. Then resist the temptation to price your cards too cheaply.
Bear in mind that people looking to buy a handmade card are looking for something special for somebody they care about, and will expect to pay a bit more. If a card is too cheap, it won’t seem as special – and it will also undermine the time and effort you’ve put in.
On the flip side, pricing too high will make people reluctant to buy! It’s an important thing to get right, so do your research. Look around on websites and at craft fairs to see what prices similar cards are being sold for.
Selling Your Cards
Where to Sell
You’ve made all your cards, and now you’re raring to get selling. So let’s take a look at the business side of things.
There are lots of avenues for selling your cards, and ideally you want to try as many as possible. Friends and family will likely be your first customers, but you’ll soon want to broaden your horizons.
Shops
An easy way to start is by asking relevant local shops if they’ll take a few – newsagents, gift shops, florists, etc. Offering to supply them on a sale or return basis – so the shopkeeper only pays for those cards that sell, and returns any unsold ones to you – should be enough to persuade them!
Don’t forget, you’ll need to price your cards more cheaply if you’re selling to shops, so they can make their profit – 50% of your usual retail price is a good rule of thumb.
If you don’t have any suitable shops locally, go a bit further afield and keep an eye out for shops that would make a great home for your cards. Anywhere with an independent, handmade ethic is a good place to try.
Ideally, however, you’ll want to sell most of your cards directly to customers yourself. With no middleman taking a cut, it’s by far the most profitable approach.
Craft fairs and card parties
Renting a stall at a craft fair is a great place to showcase your cards. Even if you don’t sell many on the day, the exposure can be invaluable. If you go along to one, get some business cards made up and take plenty along. There may be lots of competition to get a stall, since many fairs have quotas for particular crafts to ensure an even spread. Persistence will pay off here. If you keep trying and keep applying, eventually you will get a place.
Another good way to sell direct to customers is by organising card parties with friends, and asking them to bring their friends along. Lay on some snacks and drinks, offer discounts when people buy a few cards and you could do very nicely.
If you have young children, you could consider taking some of your cards along to their toddler groups too. Busy mums may appreciate the chance to multi-task and do their card shopping at the same time!
Websites
And of course online is a fantastic place to sell. As well as the ever-popular eBay, there are a number of specialist sites where you can sell your handmade crafts – you may be familiar with Etsy (US based), and Folksy (UK based), but there are lots more lesser-known sites if you look around – Dawanda and MyOwnCreation being two examples.
Perhaps you’d prefer to take the plunge with your own dedicated website. The huge numbers of template sites available now make this quicker, easier and more affordable than ever before. It’s perfectly possible to have a basic site up and running in a matter of hours.
If you’ve a bit more to spend, you can splash out on a bespoke custom-designed website. This will set you back a couple of hundred pounds as a minimum, so it’s not for everybody. You know what will suit your budget and match your ambitions.
In any online selling, one of the most important things to get right (which often means the difference between making a sale and not) is your photographs.
You must have great quality images that do your cards justice. Whether you are selling on your own site, eBay or wherever, the website is your shop window. So if you don’t have a good digital camera, either invest in one or borrow one. Take simple photos with a white background to really showcase your cards.
Marketing/Advertising your cards
The idea of “marketing” can be daunting if you’ve never done it before, but when you consider that it’s just business speak for “letting people know about your cards”, it becomes a lot less intimidating.
Word of mouth is a great way of attracting new sales. People trust recommendations from friends and family, and you’ll probably rely on this initially. But if you want to reach more people, you’ll need to get a bit more creative.
You can have lots of fun coming up with novel marketing ideas – the more unique, the better. Here’s a couple of ideas to get the ball rolling:
- Find out when your local radio station or newspaper celebrates their anniversary and send them a handmade card with a note – they may be feeling generous and give you a mention.
- Trade magazines, for example Progressive Greetings, Greetings Today and Greetings Magazine, often include details of new card ranges, so it’s worth telling them about yours. Write a paragraph about your cards – including information about the designs, an idea of price and a contact telephone number – and take a few photos (or better still gather up a few samples). Phone the magazine to find out who’s in charge of the New Products section, and send your cards and information directly to them. Include a short cover letter explaining that this is a brand new range. Repeat with all the greeting card magazines you can find!
You can also market yourself online – there are so many ways to publicise yourself for free on the Internet. Set up a Facebook page, get a profile on Twitter, start your own blog, post in craft and card making forums – all of these cost nothing and can help to build interest in your cards. If you have one, use your business name wherever possible.
But of course, your cards themselves are your biggest marketing opportunity – every card doubles up as a business card. Don’t forget to brand the back of every card you make with ‘Made by (your name/business name)’, and some contact details (a personalised stamp or something like this stamp set is a great way to do this).
People put their cards up in their homes, and if they’re receiving cards it usually means there’s a special occasion, so they’re probably getting visitors too. Make it as easy as possible for these visitors to find out that you made the card they’re holding.
A Final Thought
Expect things to start slowly at first. It may take a long time to make your first sale, but don’t get disheartened. As soon as you sell that first card, you have a customer, who will potentially recommend you to their friends – and that snowball may just grow bigger…
Enjoy the process, treat it as the hobby you love, and if people want to buy your cards, even better. It’s a new year, and there’s no time like the present to give it a go. So get cracking!